Google Slides has become a popular choice for creating presentations, thanks to its user-friendly interface, collaboration features, and compatibility with Google’s suite of products. One of the most sought-after features among presenters and presentation designers working with Google Slides is the ability to make a picture transparent. Transparent images can be used to create appealing visual slides, layer images, and enhance the overall design of a presentation. Combined with custom animations, you can produce amazing effects by having transparent pictures on top of your slides.
In this article, we will explore the process of making a picture transparent in Google Slides and discuss some use cases for transparent images. We’ll also briefly touch upon the alternative method of making images transparent in PowerPoint.
Why Make a Picture Transparent in Google Slides?
There are several reasons why presenters and presentation designers might want to make a picture transparent in Google Slides:
- Layering images: Transparent images can be used to overlay one image on top of another without completely obscuring the bottom image, creating a visually appealing effect.
- Highlighting text: A semi-transparent image can serve as a background for text, ensuring that the text remains readable while still allowing the image to be visible.
- Enhancing design elements: Transparent images can add depth and dimension to a presentation, making it more engaging for the audience.
- Creating watermarks: Applying transparency to an image can create a subtle watermark effect, allowing you to protect your presentation content without being too distracting.
How to Make a Picture Transparent in Google Slides?
Google Slides does not have a built-in feature to adjust image transparency directly. However, you can achieve a similar effect using the following workaround:
Open your Google Slides presentation and navigate to the slide where you want to insert the transparent image.
Click “Insert” in the menu, then select “Image” and choose the image you want to make transparent.
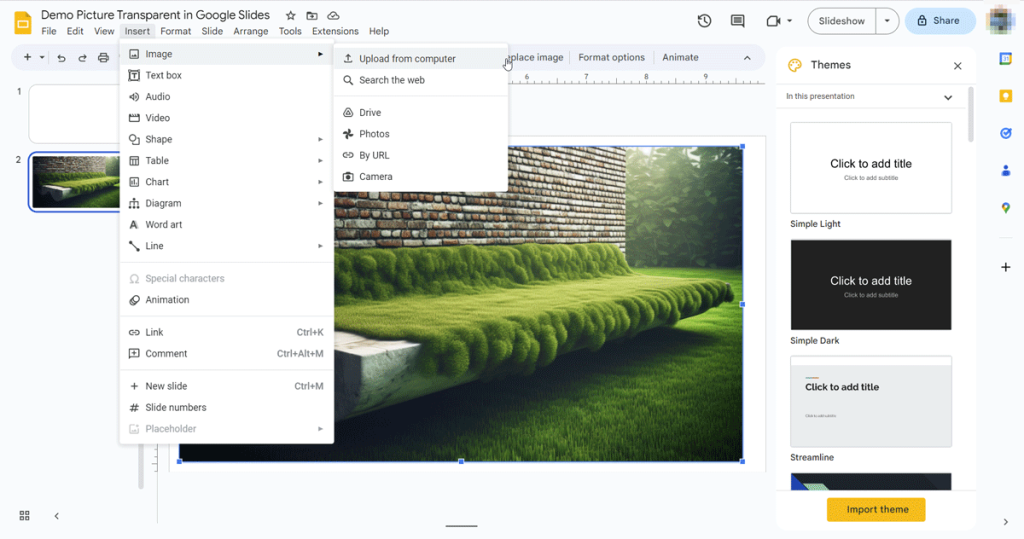
Once the image is inserted, click on the image to select it.
Click “Format options” in the toolbar or right-click the image and choose “Format options” from the context menu.
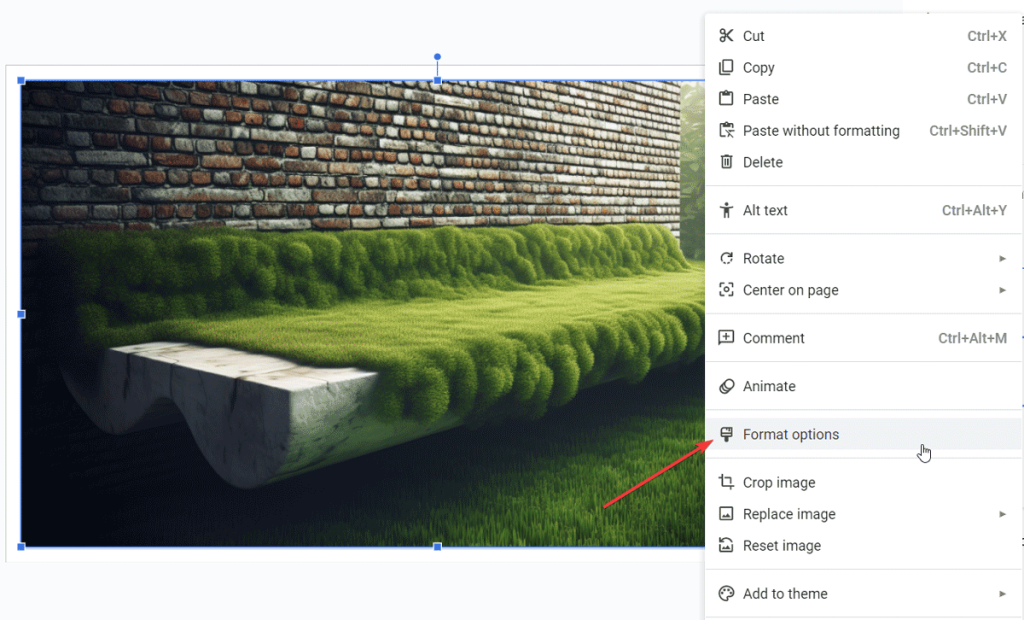
In the “Format options” pane (right side), open the Adjustments section and then adjust the “Opacity” level.
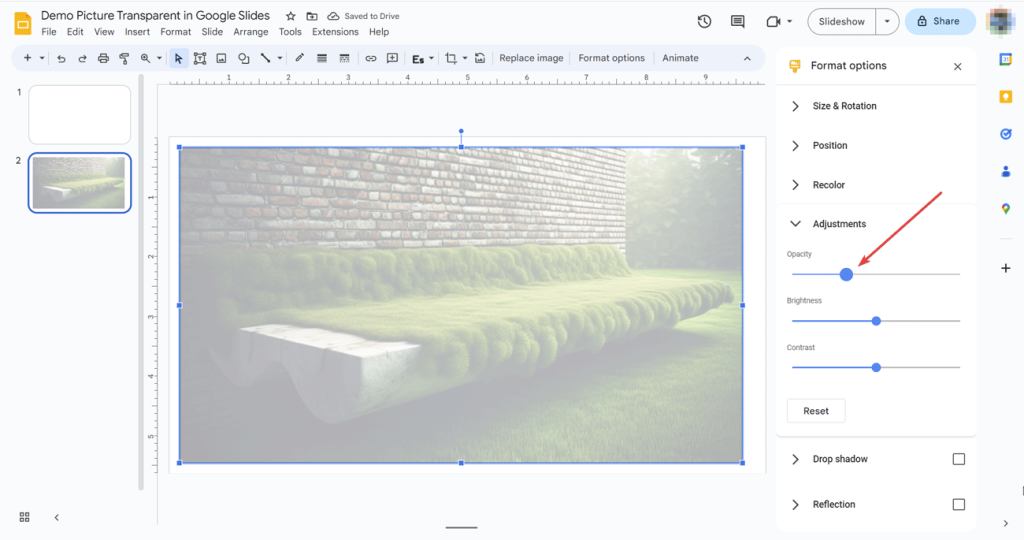
Use the “Opacity” slider to adjust the transparency of the image to your desired level.
Close the “Format options” pane, and your image should now appear transparent in the slide.
This method helps you to make a picture transparent in Google Slides. Alternatively, you can use a background remover tool to remove the background or unneeded graphics from an image, but we will cover this technique in future articles.
Using PowerPoint to Make a Picture Transparent
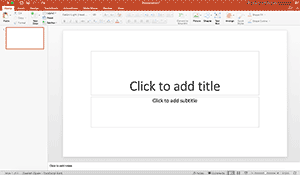
For those who prefer using PowerPoint, there is a more straightforward method to make a picture transparent. Here’s a brief overview of the process.
- Open your PowerPoint presentation and go to the slide where you want to insert the transparent image.
- Click “Insert” in the menu, then select “Pictures” and choose the image you want to make transparent.
- Once the image is inserted, click on the image to select it.
- Click the “Picture Format” tab in the toolbar.
- In the “Adjust” group, click on “Transparency.”
- Choose a preset transparency level or click “Picture Transparency Options” for more precise control using the slider.
- Your image will now appear transparent in the slide.
Conclusion
While Google Slides does not have a direct option to make images transparent, the workaround provided in this article allows you to achieve a similar result. Transparent images can enhance your presentation design, making it more engaging for your audience. For those who prefer PowerPoint, the process is more straightforward, and the results are just as effective. Regardless of the tool you choose, using transparent images in your presentations can elevate your designs and make a lasting impression on your audience.
