If you are interested to make 3D Objects for your PowerPoint presentations or 3D PowerPoint templates then this quick guide will help you to convert your 2D shapes to 3D shapes in PowerPoint using perspective and Format Shape options. You can use the same techniques explained here to make nice 3D PowerPoint graphics like the 3D Pie Chart template that you can download for free.
First, we will start adding a simple 2D Shape into the PowerPoint slide. For the example below we have added a square shape in PowerPoint that then we will convert to a 3D cube.

Make sure to right click over the shape and then we will change the Shape properties to convert it to 3D.
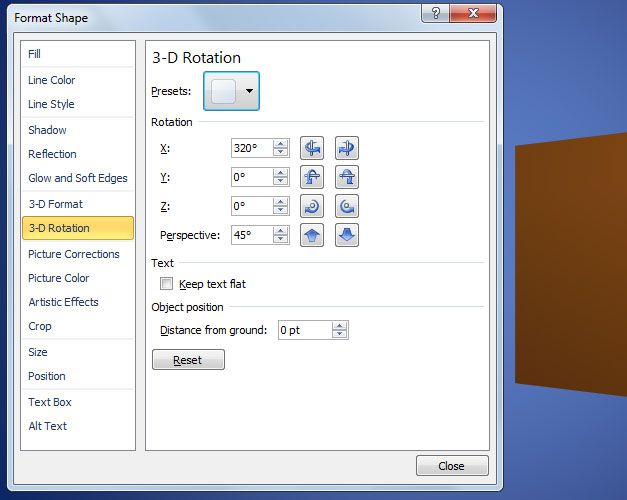
One of the properties we are interested to change is the 3D Rotation. You can pick a preset from the list on top that will quickly let you change the perspective for the object.
However, since we are going to create a perfect 3D cube, make sure to switch to the 3D format pane, so here we will add a depth to the object.
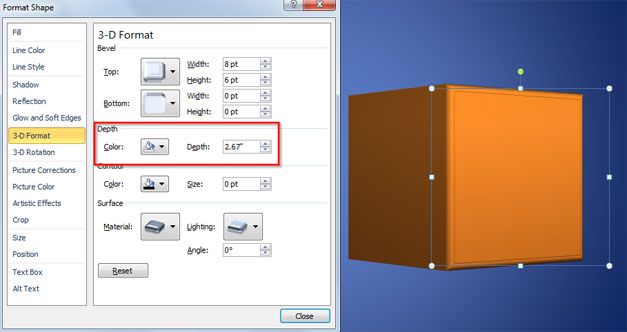
Make sure to enter the same depth value that you have in size (width or height) for the shape. This will allow us to make a 3D cube easily. Unless you want to create an irregular 3d prism, then you will be interested to keep the same values here. You can change the surface material and lighting effect for the same.
The creation of a 3D cube may have different applications. You may use it to prepare a presentation with dices and roll the dice effect. Alternatively, it can be used to model 3D structures in PowerPoint or to create a template around Minecraft.
Another 3D objects you can create with the same approach includes 3D cuboids, squared based pyramid objects, triangular prism, spheres, cylinder, hexagon prism and cone.
