Adding custom borders to PowerPoint slides is a simple yet effective way to enhance your presentations. This article will walk you through the process and explore real-world applications of this feature in PowerPoint, so you can enrich your presentations and captivate your audience with engaging presentation slides.
Step-by-Step Process for Adding Borders in PowerPoint
- Create a Blank PowerPoint presentation: Open a PowerPoint presentation or create a new blank presentation, and then insert a blank slide. You can do this by navigating to the ‘Home’ tab and choosing ‘New Slide’, followed by ‘Blank Slide’.
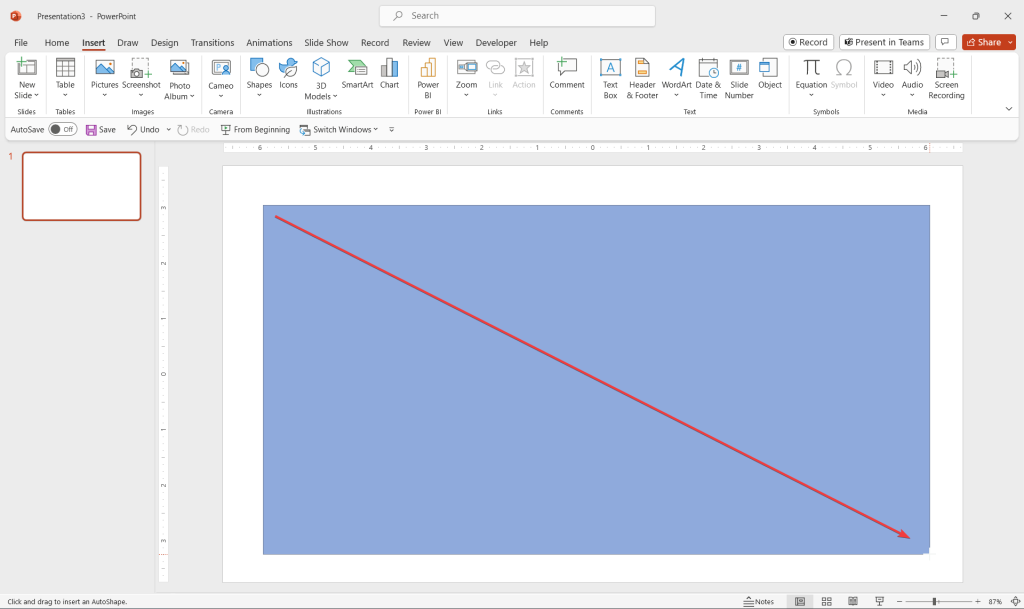
- Incorporate a Shape: Under the ‘Home’ tab, find the ‘Shapes’ button. Click on it and choose a rectangle shape from the dropdown menu.
- Draw the Border: Your mouse cursor will transform into a crosshair (‘+’). Click and drag from the upper left corner to the lower right corner of your slide to create a rectangle. Release the mouse button to set the shape in place.
- Access Shape Formatting Tools: Once the rectangle is drawn, the ‘Shape Format’ tab will open. Here, select ‘Shape Fill’.
- Set Transparency: In the ‘Shape Fill’ dropdown, choose the ‘No Fill’ option. This action creates a clear center, leaving only the outline as a border.
Customizing the Border in PowerPoint Slide
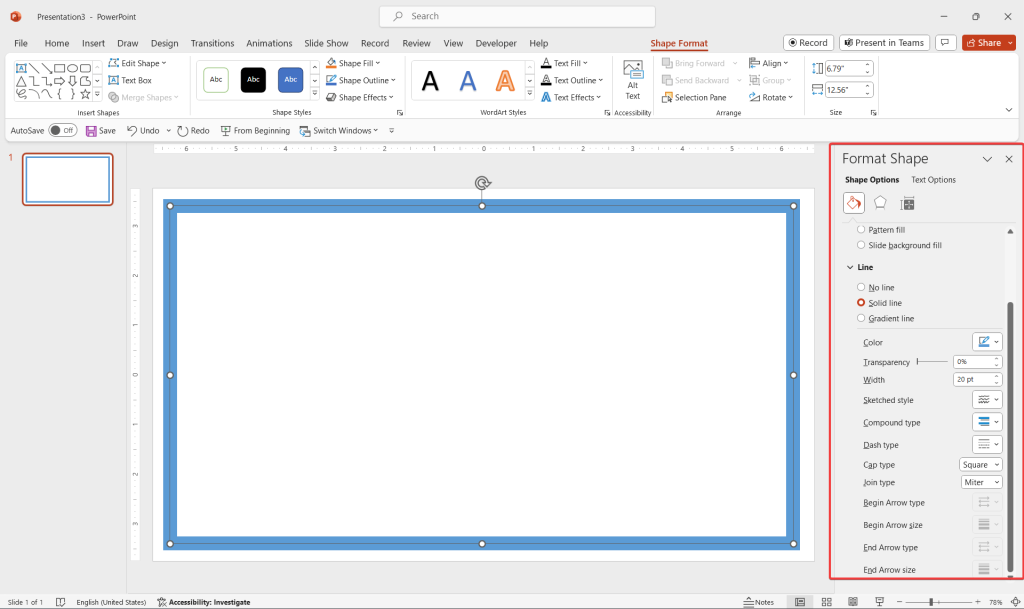
After setting up your border, the ‘Shape Format’ tab offers various customization options:
- Color Variations: Click on ‘Shape Outline’ to access a palette of colors. For more color choices, select ‘More Outline Colors’.
- Border Thickness: Adjust the weight of your border by selecting a thickness under ‘Weight’. For additional thickness options, choose ‘More Lines’.
- Line Styles: Explore different styles like straight, curved, or squiggly lines by selecting ‘Sketched’.
- Dotted Lines: For a different look, choose from various dotted line styles under the ‘Dashes’ option.
- Enhanced Effects: Add visual appeal with ‘Shape Effects’, which include shadows, reflections, glow, soft edges, bevel, and 3-D effects. PowerPoint also provides preset border styles for quick selection.
How PowerPoint Borders can be used in Real-Life presentations?
Custom borders in PowerPoint have practical uses across various domains:
- Business Presentations: A well-defined border adds a professional touch, making slides more engaging for clients and stakeholders.
- Educational Settings: Teachers can use custom borders to highlight key information or differentiate between topics.
- Creative Portfolios: Artists and designers can frame their work effectively within slides, providing a neat, organized look.
- Event Planning: Customized borders can reflect themes or colors of an event, adding a personalized touch to presentations.
In summary, adding and customizing borders in PowerPoint is a straightforward process that can significantly elevate the visual appeal of your slides. Whether for professional, educational, or creative purposes, this feature offers versatility and a touch of sophistication to your presentations.