Transparency effect in PowerPoint presentations can be really useful for any presenter who need to make a transparency on an image. This can be easier with a Photoshop or similar image editing software but if for any reason we don’t have such application or any other editor available, we can still use Microsoft PowerPoint to add transparency.
At a glance, it would seem like adding transparency to an image is easy as opening the Format Image and choose transparency, but unfortunately this option is not available there. However, we can still add transparency in PowerPoint by using shapes. Yes, shapes can be wonderful because we can add a new shape and then apply transparency to the image.
This tutorial will help you to add transparency to an image in the PowerPoint slide. This tutorial will just use PowerPoint and you can avoid to use any other image editing software like Photoshop.
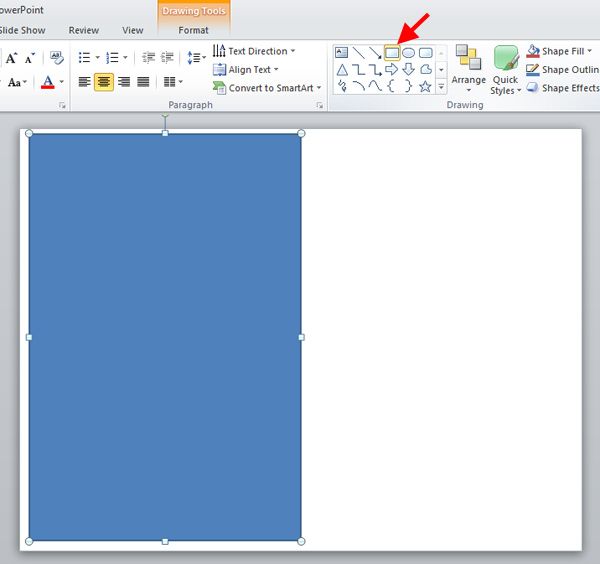
First we need to open a new PowerPoint slide and slide and create a new rectangular Shape.Obviously we can use any shape but assuming our photo or image will be rectangular. It may be a good practice to use the rectangle shape that is at our disposal.
So, please select the rectangular shape and draw a rectangle as shown below.

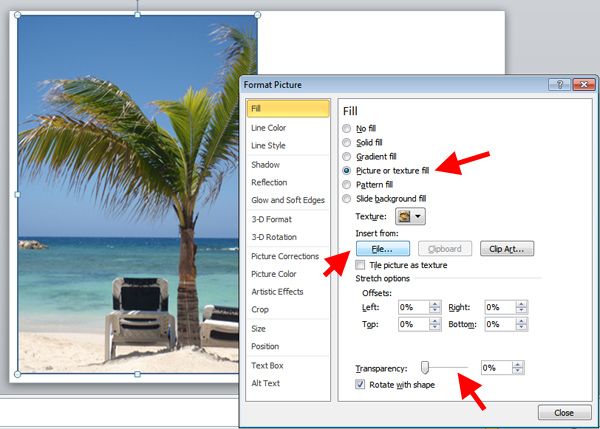
Secondly, right click on the new shape in the slide and now yes choose Format Picture.

Now, go to fill option and choose Image fill. Then you’d need to choose from File and locate any image in your hard drive.

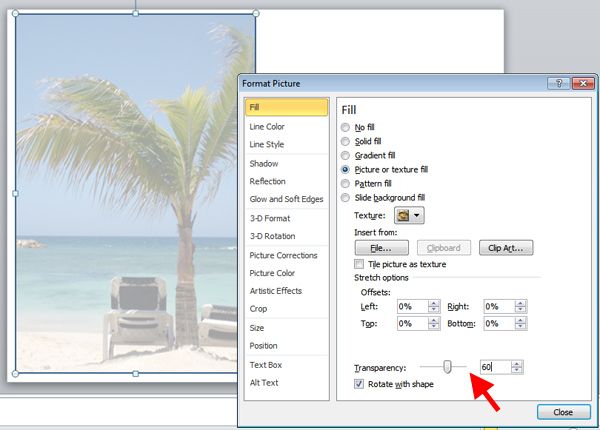
Lastly, move the Transparency slide to something like 60% so you can add the transparency to the shape, and then to the image.
This tutorial explains how to add transparency to an image used in PowerPoint slide. You can use this tutorial to learn how to add transparency shape or slides in your presentations or PowerPoint backgrounds.


