Microsoft PowerPoint is the first program that comes to mind when you need to put together slides for a public presentation, design a simple infographic, or even a mini-game. However, when it comes to creating online courses, PowerPoint alone is usually not enough.
Fortunately, there is iSpring Suite — a robust software that turns PowerPoint into a tool with limitless capabilities for creating professional online courses. Read on to learn what it offers.
Why PowerPoint Alone Is Not Enough for Creating an Online Course
We have all encountered a course created with PowerPoint at least once: at school, during a university lecture, or in a training session at work. However, if we look at the purpose of a training course, it becomes clear that PowerPoint is designed for presenting information rather than training. Here are some of its key limitations:
- No assessment tools. PowerPoint doesn’t include built-in tools for creating assessments or quizzes. It can’t help you test a learner’s knowledge and check their understanding of the training content.
- No tracking and reporting. You can’t monitor how learners perform in tests to allow you to make informed decisions on learning effectiveness.
- No compatibility with eLearning standards. PowerPoint does not natively support SCORM or xAPI. This means a course created with PowerPoint can’t communicate data about learner activity back to a learning management system (LMS). And that’s critical for online education.
Meet iSpring Suite — PowerPoint’s Ideal Partner for Creating Online Courses
Despite all of these limitations of PowerPoint, you don’t need to discard this program entirely. On the contrary, among the numerous add-ons that can expand its functionality, a top-rated one is iSpring Suite.
It’s a comprehensive suite of authoring tools that provides all the features you may need to create an online course. And the best part? You don’t need to learn how to navigate new software. Once you’ve downloaded the tool, the iSpring Suite tab will appear in your familiar PowerPoint interface:
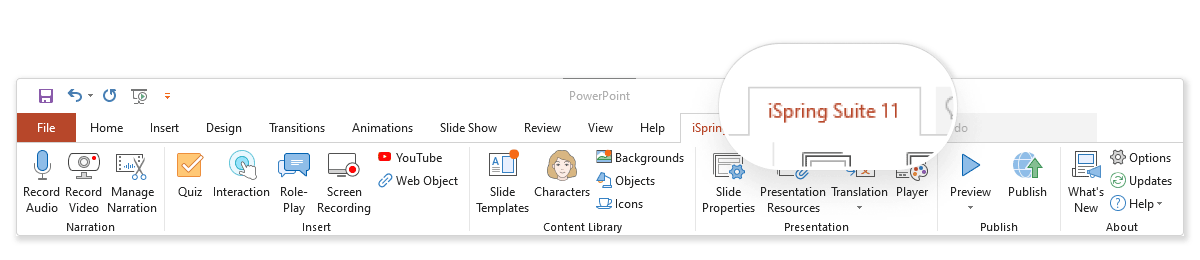
Thanks to its familiar interface, PowerPoint users can create their first online course with ease. And seasoned course developers are able to streamline content authoring and increase their income by managing multiple projects simultaneously.
Next, we’ll go into more detail about what you can create with iSpring Suite.
How to Create an Online Course with PowerPoint and iSpring Suite in 6 Simple Steps
Regardless of the type of online course you create and eLearning software you use, it’s better to do some prep work before jumping into course building:
- Define the objectives of your course. Answer the following question: what should your learners know or be able to do by the end of your course? This will allow you to focus on the pertinent topics and exclude irrelevant ones.
- Know your course’s audience. Understanding who your learners are will help you design content that meets their needs. Consider their average age, level of education, location, computer skills, devices they use, and any prior knowledge they may have in this area.
- Plan your course adequately. Break broad topics down into subtopics and arrange them in a logical order. Develop a course storyboard that outlines the course’s content, multimedia components, assessments, and visual design instructions, and helps ensure that your course has a coherent flow.
Once all the preparation work is done, it’s time to open PowerPoint and explore how iSpring Suite can help bring all your ideas to life.
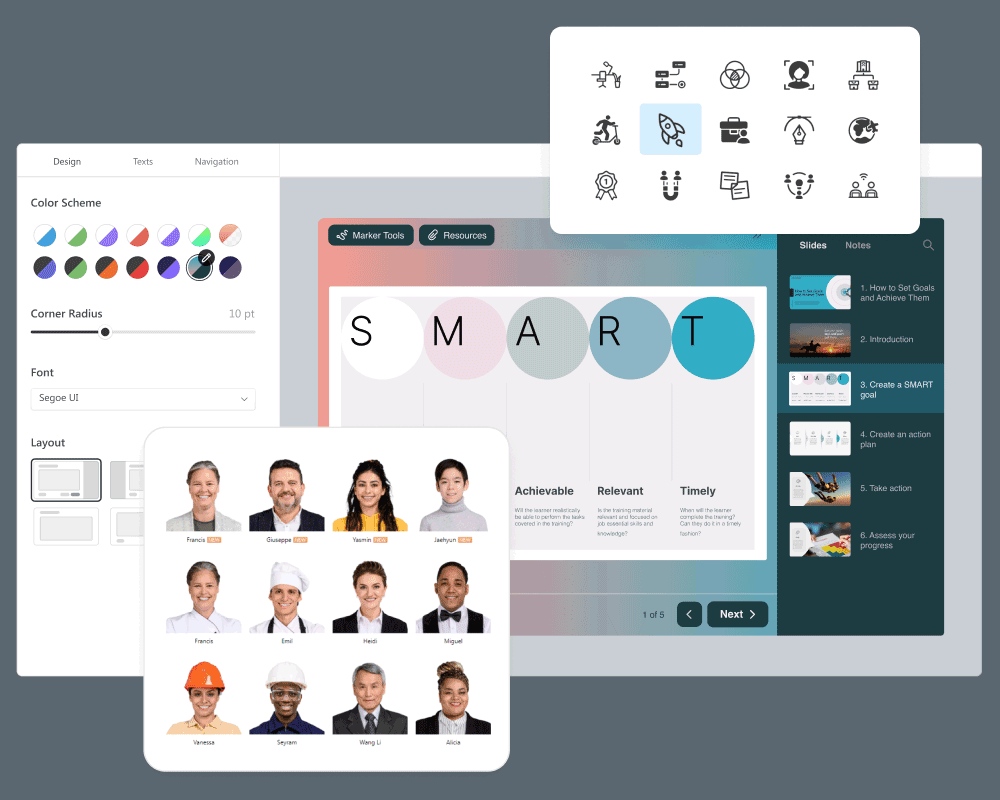
Step 1. Discover iSpring Suite’s Rich Content Library
One of the key advantages of iSpring Suite is its built-in Сontent Library — a collection of over 89,000 ready-made assets that include:
- Slide templates specifically designed for creating online courses.
- A variety of backgrounds: offices, universities, stores, living spaces, and more.
- Characters of different ages, appearances, and professions — both photographic and illustrated.
- Objects such as devices, office supplies, furniture, and a complete set of icons for all possible needs.
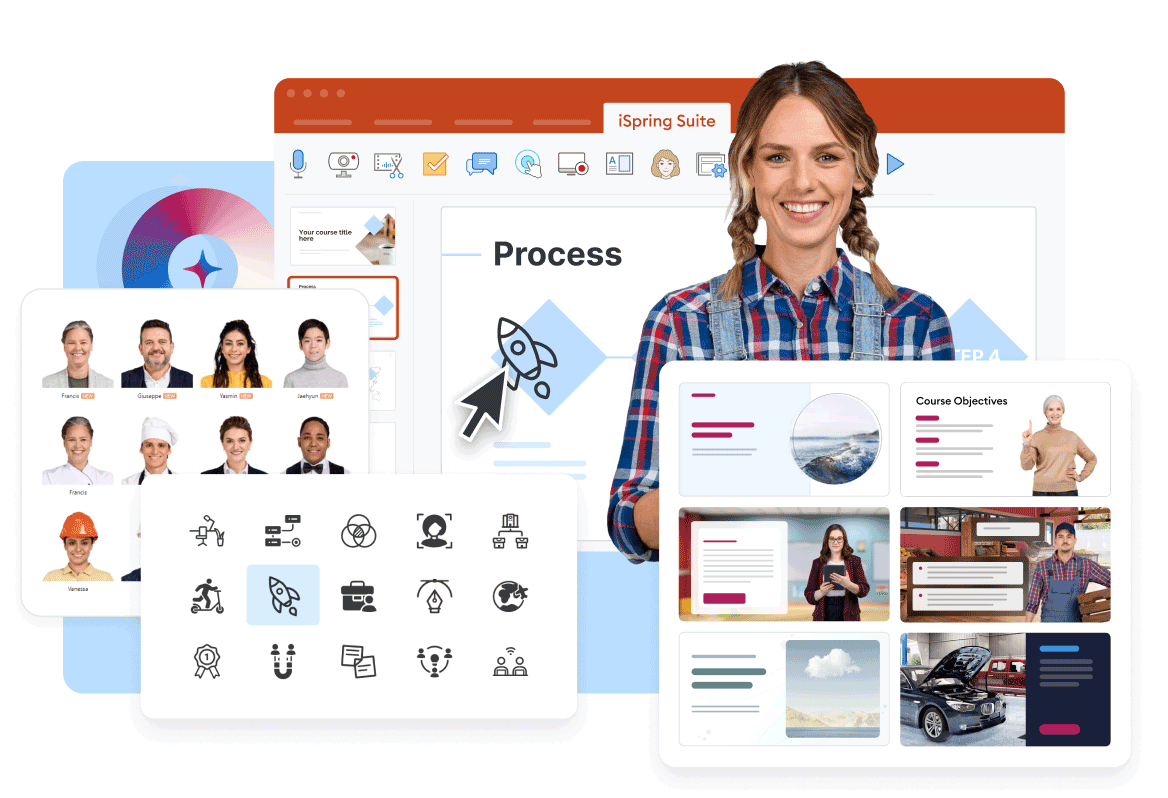
Moreover, the tool features Character Builder, which allows you to create your own unique characters. You can adjust their skin tone, hairstyle, and outfit, add accessories, and change poses. This is a great opportunity to tailor the course content to a specific audience or course topic and make it resonate more with those learners.

With all these resources at your fingertips, there’s no need to spend time searching for suitable images or infographics on stock photo websites. Instead, you can focus on what matters most and build immersive courses several times faster.
Step 2. Record Video Content
iSpring Suite offers more than just slide-based course creation. If you love training videos, you’ll appreciate its robust video studio.
The studio allows you to record video lectures and make them look professional. You can add titles, captions, and intro slides, delete unwanted fragments, adjust the video’s pace, remove background noise, and add smooth transitions to make your content flow naturally.
When recording screencasts or software tutorials, you can combine them with your webcam video or a voiceover to provide real-time commentary, display hotkeys automatically, and even hold a specific frame to offer in-depth explanations.
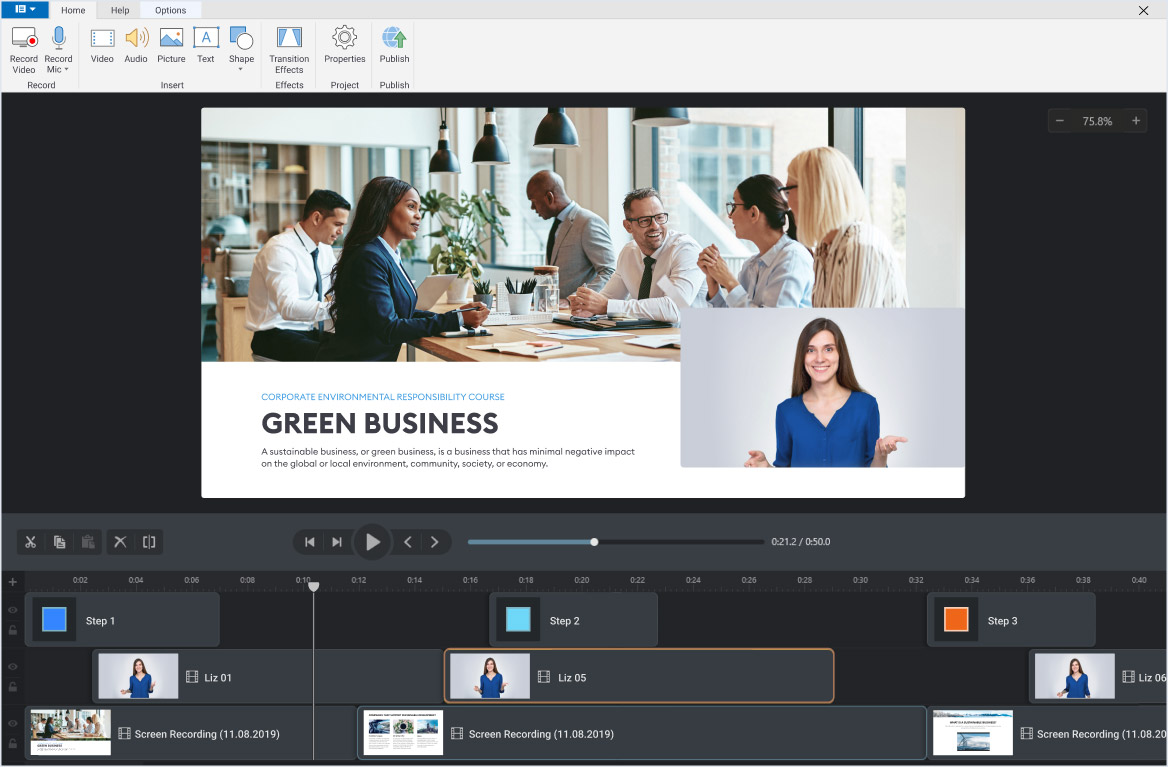
Another great opportunity is combining talking-head videos with PowerPoint slides. This way, you can create a sense of the instructor’s presence, provide additional information on the topic, and make complex ones more accessible.
Step 3. Build vibrant role-play simulations
Role-playing is always a great idea when you need to provide hands-on experience, especially if you’re teaching languages, training in various communication skills, management tactics, sales strategies, or customer service skills.
If creating such things sounds like a pro-level task, fret not! With iSpring Suite’s drag-and-drop interface, creating a role-play is super easy: just pick a suitable character and background from Content Library, create the first scene, and provide response options that will lead to other scenes based on the learner’s choices.

To make your role-play even more immersive, you can add voiceovers that narrate the character’s statements from your computer or easily record them on the spot.
Step 4. Add quizzes
Quizzes are an essential part of any training course. They serve as a self-check, help reinforce knowledge, and measure its retention. Creating a quiz with iSpring Suite is as easy as preparing a PowerPoint slide:
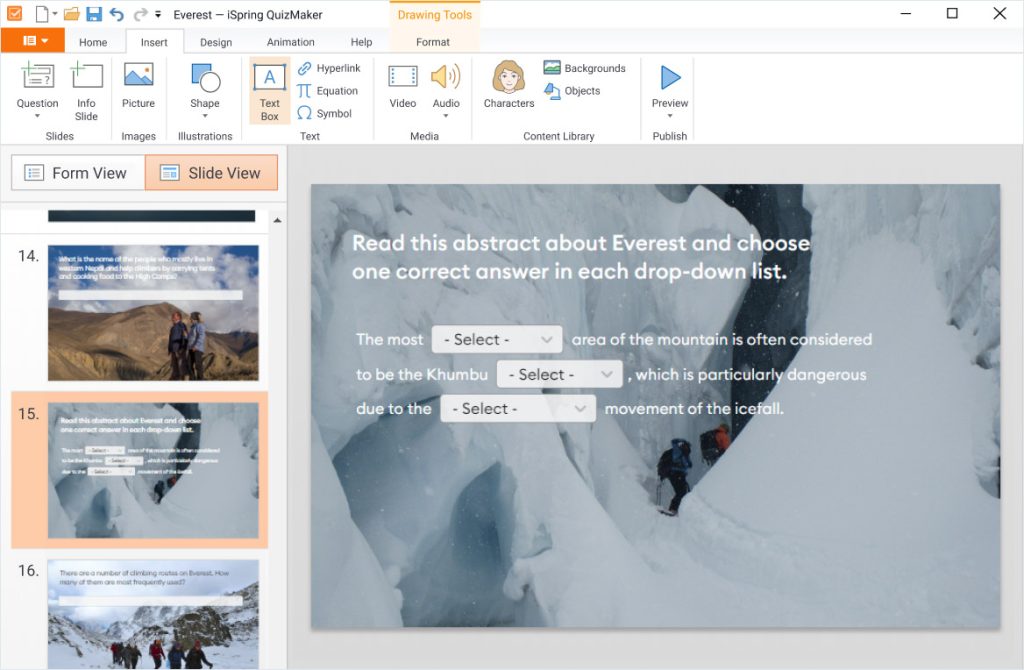
The tool provides 14 ready-made quiz templates, including multiple-choice, matching, hotspot, and drag-and-drop questions. To make them more challenging, you can customize testing rules: set time limits, limit the number of attempts allowed, and shuffle questions and their answer options. You can also provide learners with feedback on incorrect answers and apply branching to create a non-linear path.
Step 5. Customize the course player
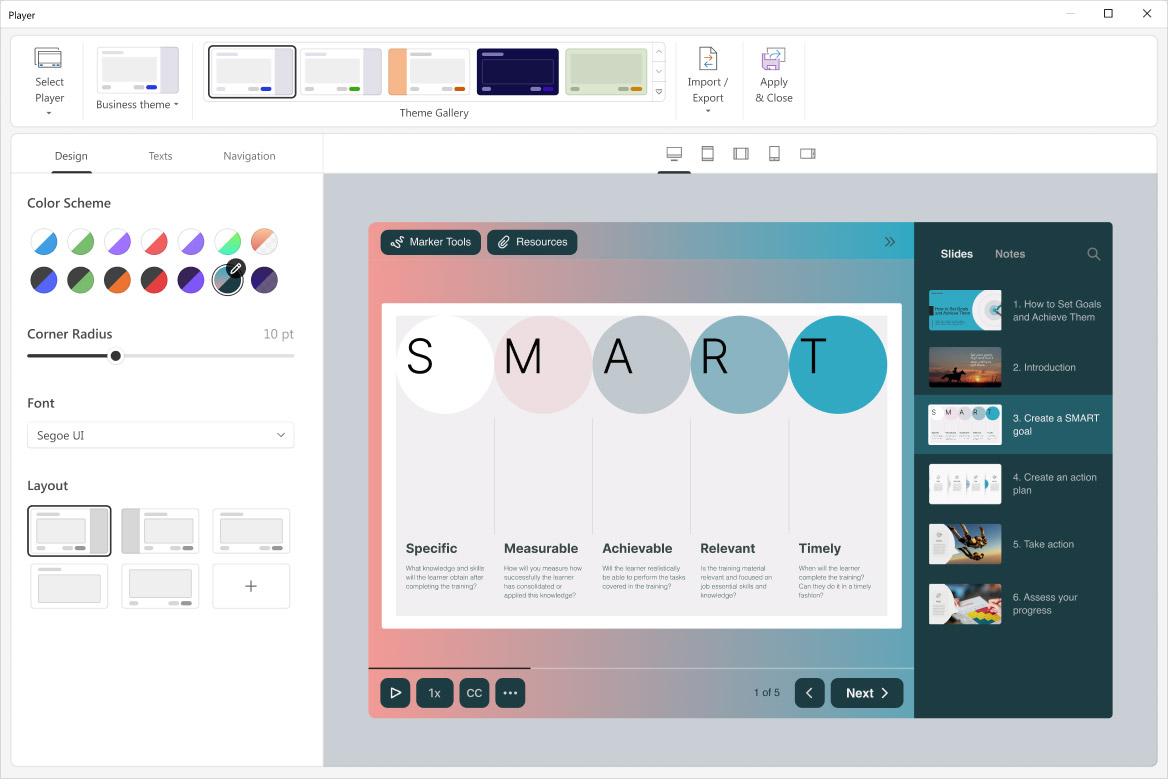
Creating online courses doesn’t just involve generating content; the way this content is presented also plays a significant role in the learner’s experience. That’s why it’s crucial to consider a convenient course player.
The course player is the interface that your audience interacts with — the controls they use to navigate the course and interact with the content. iSpring Suite offers a collection of pre-built course player themes. Just select a suitable preset color scheme to make it visually appealing and your course is ready to go. You can also customize the colors as desired to tailor your course to your brand book, audience, or topic.
Step 6. Publish your course
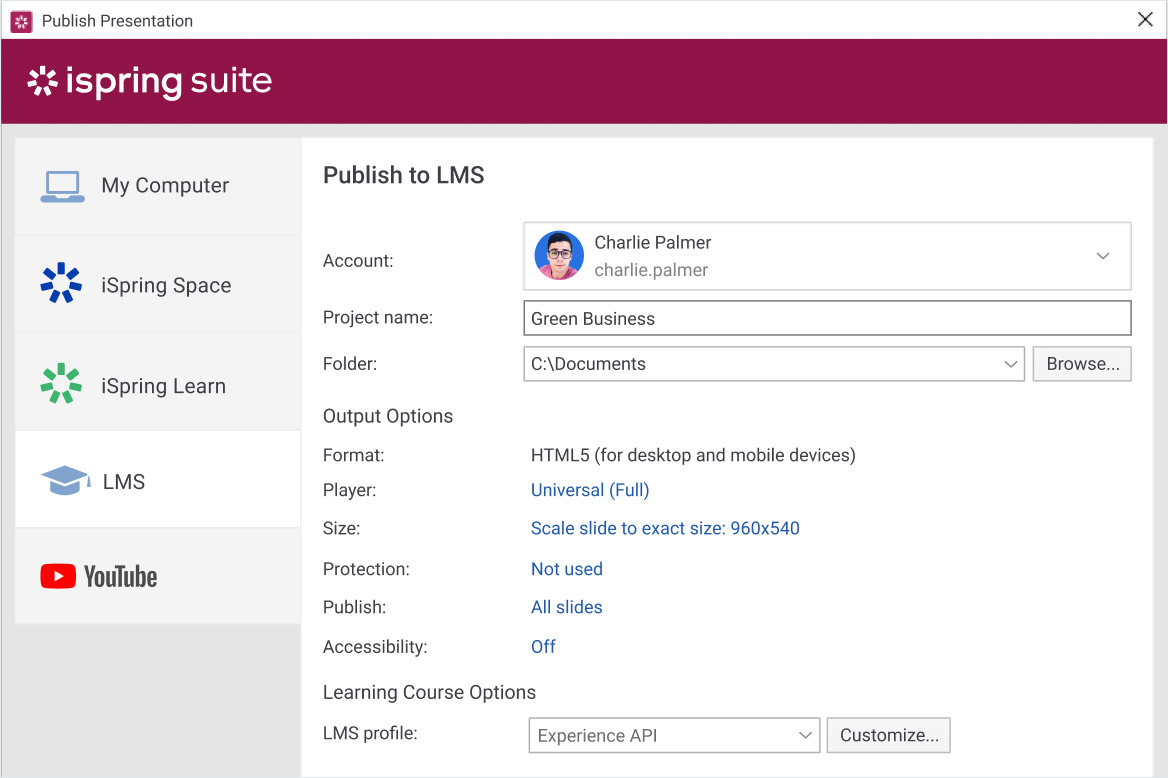
Before publishing your course, you can use the preview mode to ensure that everything works correctly. If you’re happy with the result, it’s time to deliver the course to learners.
If you want to post it on your website or blog, you can save your course in HTML5. Alternatively, if you are planning to upload your course to an LMS, choose one from supported formats: SCORM, AICC, Tin Can (xAPI), or cmi5. If necessary, you can even save your course as an MP4 file for uploading directly to YouTube from iSpring Suite.
Whichever format you choose, iSpring courses will display perfectly on all devices and adapt to any screen size.
Conclusion
We hope you found this article insightful. If you have an idea for an online course or any PowerPoint slides that you have on hand, why not start experimenting right now? Download a free trial of iSpring Suite and explore its capabilities firsthand!