Deleting a textbox in PowerPoint might seem like a simple task, until it doesn’t work. You press Delete, and nothing happens. Whether you’re making an important presentation, editing a slide template, cleaning up a design, or removing unwanted text, you may find that some textboxes just refuse to go away.
In most cases, it happens because the textbox is part of a Slide Master, grouped with other objects, or locked inside the slide layout.
In this guide, you’ll learn exactly how to delete a textbox in PowerPoint, what to do if it won’t delete, and even a few hidden tricks that professional designers use to clean up slides quickly and safely.

TL;TR Select the textbox and then hit the DEL key.
Understanding Textboxes in PowerPoint
Before fixing the issue, it’s useful to understand the difference between the types of textboxes in PowerPoint:
- Regular Textboxes: Added manually using Insert → Text Box. These can be freely moved or deleted.
- Placeholders: Built into a slide layout (e.g., “Click to add title”). They come from the Slide Master and can’t always be deleted in Normal view.
- Grouped Objects: A textbox might be grouped with shapes or images, preventing direct deletion.
- Locked or Background Elements: Some design templates use “background graphics,” which can’t be selected unless you modify the master.
Knowing which type you’re dealing with will help you choose the right fix.
Delete a Textbox in Normal View
For most presentations, deleting a textbox is as simple as:
- Click on the textbox border (not the text inside).
- Press Delete on your keyboard (DEL key).
If the box doesn’t go away, try the next methods, it’s probably not a regular textbox.
Delete a Textbox from the Slide Master
If the textbox is part of a template layout, you won’t be able to remove it in Normal view. You’ll need to access the Slide Master. Here is a step by step guide:
- Go to the View tab → click Slide Master.
- In the left sidebar, select the layout being used by your slide.
- Click the textbox you want to remove and press Delete.
- Close the Master View to return to your presentation.
Content text placeholders such as “Click to add text” are typically controlled by the Slide Master. Removing them there removes them from all slides using that layout.
Ungroup the Textbox if It’s Grouped with Other Objects
Sometimes, textboxes are combined with other elements like icons, shapes, or diagrams. You’ll need to ungroup them before deleting.
To ungroup grouped shapes:
- Select the object containing the textbox.
- Right-click → Group → Ungroup.
- Now select the textbox and press Delete.
Press Ctrl + Shift + G (Windows) or Cmd + Shift + G (Mac) to ungroup instantly.
Delete a Textbox Hidden Behind Other Objects
If your textbox is behind an image or shape, you might be clicking the wrong element. Use the Selection Pane to identify it.
How to use the Selection Pane:
- Go to Home → Select → Selection Pane.
- A sidebar appears with a list of all elements on the slide.
- Click the eye icon next to each item to hide and show objects until you find the textbox.
- Once located, select it and press Delete.
This is one of the most effective ways to manage complex slides.
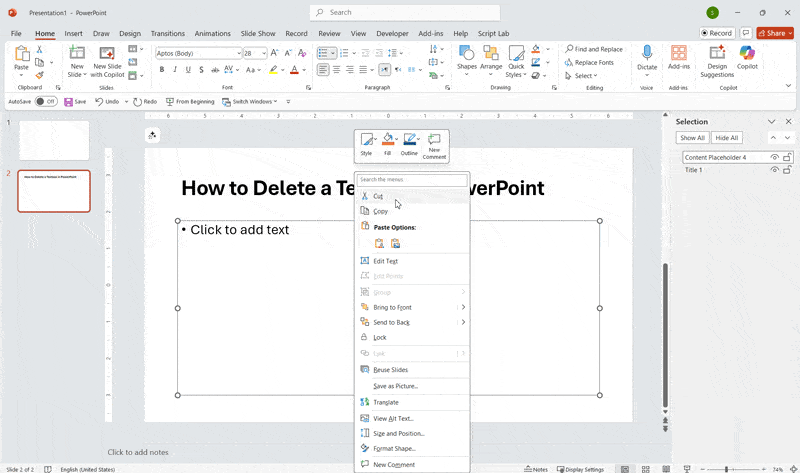
Alternatively, you can delete the textbox with the mouse, by right clicking and then clicking Cut. This will place the textbox in your clipboard but will also remove it from the slide canvas.
Delete a Textbox That’s Locked or Part of the Background
Some presentation templates in PowerPoint have background graphics that include text. These cannot be selected or deleted in Normal View. However, to remove them, you can:
- Right-click the slide → Format Background.
- Under Background, check or uncheck Hide background graphics.
- If the textbox disappears, it was part of the background design.
- To delete it permanently, return to View → Slide Master and remove it from there.
Hidden Ways to Remove Textboxes in PowerPoint
Even after trying all the regular fixes, some textboxes seem impossible to remove. These advanced techniques can help uncover and delete those hidden elements.
1. Use the Selection Pane as an X-Ray Tool
If a textbox is layered underneath other content:
- Go to Home → Select → Selection Pane.
- Toggle the visibility (eye icon) to find the textbox.
- Select it directly from the list and press Delete.
Pro Tip: Rename items in the Selection Pane (e.g., “Title,” “Footer,” “Logo”) for better organization when working on complex slides.
Zoom Out to Find Off-Slide Textboxes
Textboxes sometimes end up outside the visible slide area, especially in imported presentations.
To locate them:
- Go to View → Zoom → Fit to Window.
- Zoom out further using Ctrl + Scroll (or Cmd + Scroll).
- Look around the gray workspace for stray textboxes.
- Select and delete them.
Delete Textboxes via Outline View
The Outline View in PowerPoint lists all text in your presentation — including hidden boxes.
Steps:
- Go to View → Outline View.
- Look through the list for the unwanted text.
- Delete it directly from the outline.
- PowerPoint automatically removes the corresponding textbox.
This method is especially helpful when cleaning up placeholders with leftover text.
Delete Multiple Textboxes Quickly
To remove several textboxes from a single slide:
- Press Ctrl + A to select all objects in the current slide.
- Hold Shift and click on the ones you want to keep.
- Press Delete to remove everything else.
Alternatively, use the Selection Pane to Ctrl-click multiple textboxes and delete them together.
Final Words
Learning how to delete a textbox in PowerPoint isn’t just about pressing Delete, it’s about understanding why certain boxes won’t go away. They might be part of a Slide Master, grouped, hidden behind another element, or even locked in the background.
Once you know where to look, the fix takes only seconds. From using the Selection Pane to exploring Outline View or leveraging Slide Master editing, you can regain full control over your presentation layout.
A clean slide is a professional slide, and mastering these simple techniques will help you design presentations that look polished and clutter-free.