While Google Sheets, Google Docs and Google Slides are widely used Office web apps by Google, the lesser known gems in the Google Drive family include Google Drawings and Google Forms. We previously showed you how to use Google Drawings, this time we will show you how to use Google Forms to create a survey.
Getting Started with Google Forms
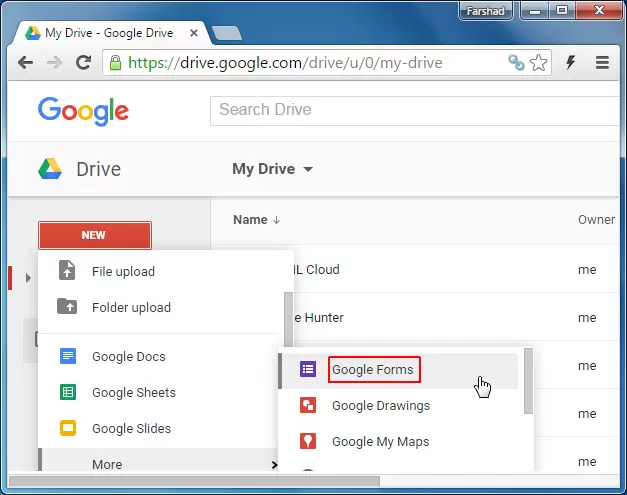
There are a number of ways by which you can access Google Forms. You can simply go to google.com/forms or access it directly via Google Drive.
Creating a New Survey
When creating a new survey form you can start by adding a title, description and your questions.

Select a Title, Description and Theme
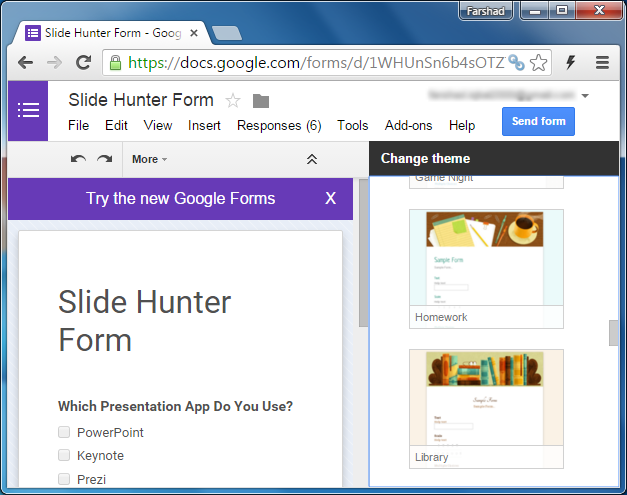
You can add a title at the top, with a description for your form and head over to the Change theme option in case you wish to change the default plain white theme of the form. There are a number of Google Forms themes to choose from and you can even pick a theme from another form.
Select Question Type and Add Your Questions
The Question Types section allows creating questions using; Lists, Multiple Choice, Text (short answers), Paragraph text (detailed text based response), Scale (ranking from 0-10), Grid (response from 1-5), Date, Time and Checkboxes.

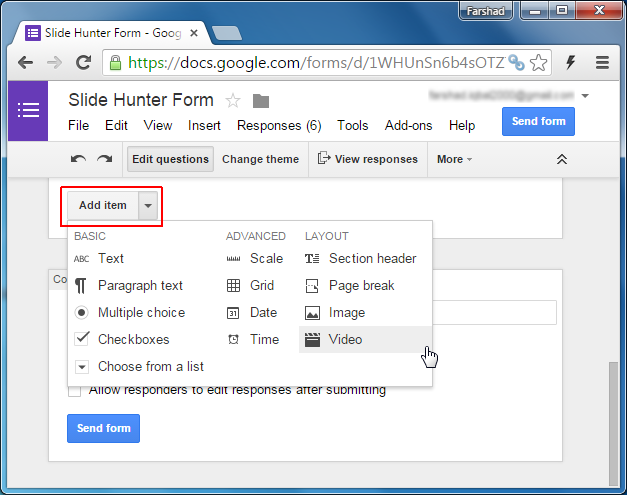
Adding Items to Your Forms
You can use the Add Item option to add images, videos, page breaks, section headers and other types of objects and elements within your forms.
Configure Your Form Settings
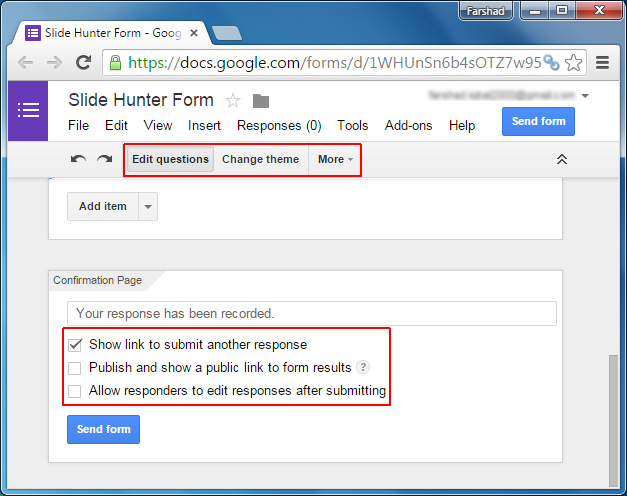
After you have added one or more questions and created your survey form, it will be worth reviewing and configuring your form settings.
Show link to submit another response: This option reveals a link to submit another response for the same survey.
Publish and show a public link to form results: As the title implies; this option is used for viewing a summary of the submitted responses by all respondents.
Allow responders to edit responses after submitting: Enabling this option allows users to go back and edit their response in case the might have picked an option in error or may change their mind after submitting a response.
Needless to say, you can edit the form questions, theme, as well as view the live form and responses by using the options located on the top. Once you are satisfied with your form, click Send form.
Send and Share Form
You can send your form to users via email or direct link, embed it on a website or use the social media buttons to share the form link to Facebook, Google Plus or Twitter. Furthermore, you can also add collaborators to edit and modify the form.

Submitting a Survey Response
Once your form is available to the user (depending upon the sharing options), he/she can submit answers using an Internet connected device.
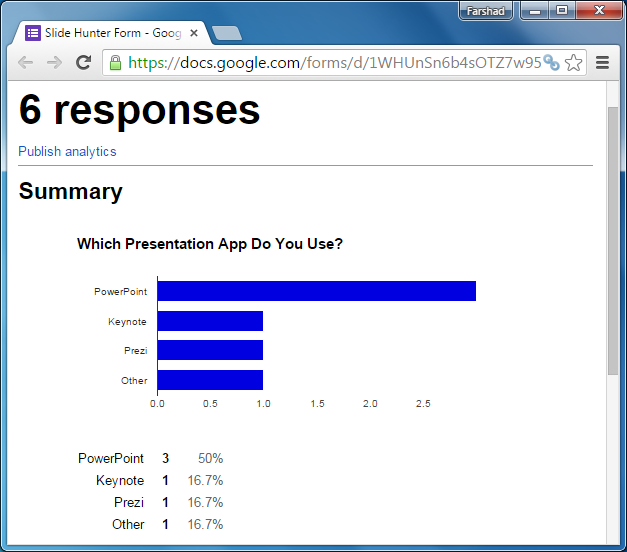
As you can see from the screenshot below, we created sample survey templates with checkboxes; asking about the respondent’s preferred presentation app to determine whether they preffer using Keynote, PowerPoint, Prezi or other apps.

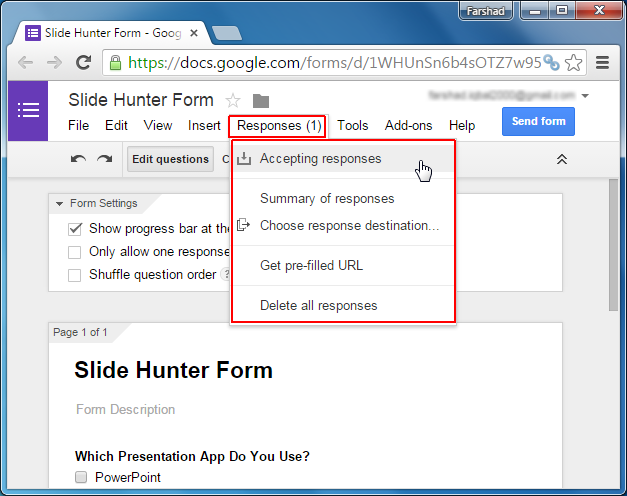
Accepting and Managing Survey Responses
Once a response is submitted, you can view your responses by going to the respective form and choose to accept or reject them. The Responses menu includes options for accepting and deleting responses, viewing the summary of responses, getting a pre-filled URL with your responses (you can add your desired answers and generate a URL which shows your response) and move the survey data to a spreadsheet for analysis without affecting the survey form (choose response destination option).
When viewing the response summary you can also make the analytics Public by publishing them.