Although numerous tutorials recommend that too much text on a single slide is not a good idea and less text with only key points is the golden line. But it’s not necessary that PowerPoint with much text is absolutely worse. At times large paragraph of text is required when it is analysts cited from others’ works. When you insert an image into a PowerPoint presentation, text is re-positioned above, below or to either side of the image. To blend the image into your text, wrap text around the image. Wrapping text means the text completely surrounds the image on all available sides. By wrapping text around images in PowerPoint, you can place your image anywhere on the presentation and still have your text look great. You can also wrap text around an image to add details about the image around the actual image.
Open PowerPoint 2010 presentation and Insert your image or images on your PowerPoint slide.
Drag your image or images to the desired locations on the slide.

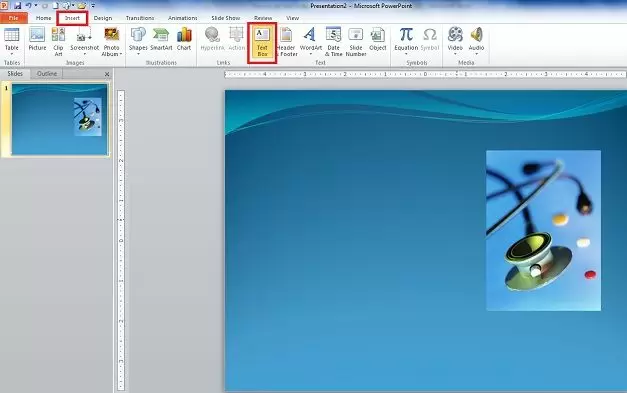
Select the ‘Insert’ tab and Select ‘Text Box’ within the ‘Text’ group. Position your text box around your image and Drag the small circles around your text box to resize the text box.

Add additional text boxes until your text boxes wrap around the image.

If you want to wrap text around an image or shape in PowerPoint, the space key and Shift-ENTER in are very useful.
Wrapping Text around Irregular Objects
To get wrapped text around the image is very simple. Just before overlapping the text with the graphic, click Shift-ENTER to add a line break. Below is example, which shows how to use the space key inside a paragraph to leave space for an irregular shape or image.

If you want text for testing purposes, try to use the’ =rand () function’ to add some random text. This article is intended to show how to wrap text around image in PowerPoint presentations.